Make plastic bottle butterflies from an empty water bottle, a printable butterfly template, and orange, black, and white markers. This recycled art activity turns clear plastic into colorful decorations while giving kids a reason to look closely at monarch butterflies.
We had plastic bottles left over from another activity and decided to give them a second job before sending them to the recycling bin. Our finished butterflies became a branch display in our living room, and the original step-by-step photos below show exactly how we made them.

Plastic Bottle Butterflies at a Glance
This project works best as a shared activity: an adult prepares and cuts the plastic, while kids help choose colors and trace the design when their materials are appropriate for their age. Younger children can color the paper template while an adult makes the plastic version.
One bottle made two butterflies in our original project, but the number depends on the bottle and the printed template size. Plan time for preparation, drawing, and drying rather than treating the original 30-minute craft estimate as a guarantee.
The curve of the bottle gives the wings a little dimension without heat or special shaping tools. It also means that a flat paper design can look different once it becomes a curved plastic object—an easy observation to explore together.
Supplies for Recycled Butterfly Art
This post contains affiliate links. As an Amazon Associate, Our Family Code earns from qualifying purchases. Please see our Disclosure Policy for more details.
- A clean, empty plastic water bottle with a smooth middle section
- The free butterfly template
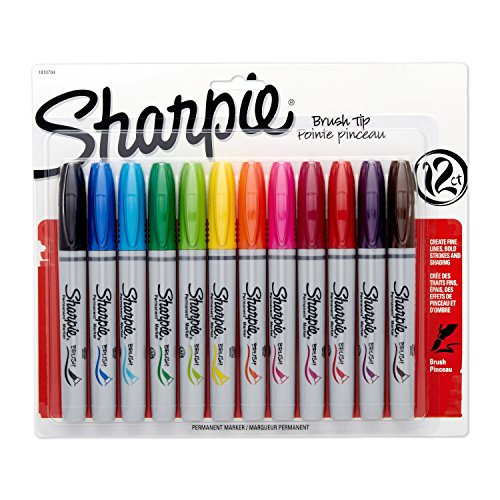
- A black oil-based paint Sharpie for the outline
- An orange Sharpie brush marker and a white regular paint pen for the wing details
- Tape to hold the paper behind the plastic
- Scissors for an adult, a nail file for rough edges, and a covered work surface
Choose a bottle that held drinking water, wash it, and let it dry completely. Avoid bottles with residue, deep ridges through the drawing area, brittle plastic, or damage that makes them difficult to handle.
Our original combination used a black oil-based paint marker, an orange brush-tip permanent marker, and white paint pen. Check each product’s label for age restrictions, ventilation, drying instructions, and whether it is suitable for plastic; “permanent” does not automatically mean appropriate for young children.

Download the Free Butterfly Template
Get the free butterfly coloring page and tracing template before you begin. You can also open the original plastic water bottle butterfly template PDF used for this project.
Print one copy and check whether the outline fits inside the usable section of your bottle. If it does not, adjust the print scale or choose a wider bottle instead of squeezing the design across a ridge or sharp edge.
Keep the paper after tracing the first butterfly so you can use it again for the second. A spare copy is handy for planning wing colors before anyone starts drawing on plastic.
How to Make Plastic Bottle Butterflies
1. Have an Adult Prepare the Bottle
An adult should remove the top and bottom of the bottle, leaving the smooth middle section. Keep children away from the cutting area and collect small scraps immediately.
We saved the top and bottom for another activity in our original project. Only keep pieces that can be stored and handled safely; there is no need to save every scrap to make the reuse lesson meaningful.

Cut the remaining middle section into two pieces as shown below. Inspect the edges before a child handles either piece, and smooth small rough areas with a nail file.
A file does not make every piece safe: discard plastic that remains sharp, cracked, or difficult to work with. Let an adult hold the prepared sheet if its curve makes tracing awkward.

2. Tape the Template Behind the Plastic
Place the printed butterfly beneath one clear plastic section so you can see the outline through it. Tape the paper to the underside, keeping the tape away from the lines you want to trace.
Check the whole outline before opening a marker. The body and both wings should fit on the usable plastic, with enough room around them for an adult to cut later.

3. Trace the Butterfly Outline
Use the black marker to trace the outline and wing details from the paper. Follow the marker label and use short, controlled strokes rather than trying to complete every line in one movement.
Pause if the paper shifts, and secure it again before continuing. The template helps place the design, but the finished butterfly does not need perfectly identical lines to be a successful art project.

Let the outline dry according to the product instructions, then carefully peel the paper away. Removing the template makes it easier to see the clear areas you will color next.

Repeat the tracing process on the second plastic piece. You can make matching butterflies or use the second one to try a different arrangement of wing colors.

4. Add Orange and White Wing Details
Color the larger wing sections orange, leaving the black lines visible. Add white details with the paint pen, using a monarch photograph as a reference if you want to compare the craft with a real butterfly.
We chose the orange brush marker and white paint pen to create contrast with the dark outline. Some areas let more light through than others, giving the finished art a stained-glass-like appearance.
Test unfamiliar markers on a spare piece of the same plastic first. Look for smearing, uneven coverage, or ink that rubs off after the stated drying time before using that combination for the whole design.

5. Have an Adult Cut Out the Butterfly
Once the colors are dry, an adult should cut around the outside of the butterfly. Work slowly around the wing curves and avoid narrow points that create fragile or sharp edges.
Check the entire edge again and smooth minor rough spots with a nail file. Keep the finished decorations out of reach of babies and children who put objects in their mouths.

6. Arrange an Indoor Butterfly Display
Set the butterflies on a branch or another stable indoor display where their colors can catch the light. Let children suggest the arrangement while an adult handles the branch and any attachment materials.

Our original display used an amber colored vase in the living room. A container you already own can work just as well if it holds the branch securely.

Try viewing the display against a light background and a darker one. Ask which wing details are easiest to see in each setting and whether the curved plastic changes the view from the side.

Watch the Original Butterfly Craft Video
Connect the Craft to Monarch Butterfly Migration
Monarch-inspired art makes a useful starting point for a fall migration conversation or a spring nature study. Our Wisconsin family has enjoyed seeing monarchs, and the orange-and-black wing pattern gave us a familiar design to explore.

Migration is a seasonal movement between places that provide different conditions for survival. For North American migratory monarchs, the winter destination depends on the population and its route.
The U.S. Fish and Wildlife Service migration map shows eastern monarchs overwintering in central Mexico and western monarchs overwintering along the California coast. Use that map for the main comparison rather than teaching three fixed routes or one identical journey for every butterfly.
The original graphic below is preserved with this activity, but its route labels are an older simplified illustration. In particular, the Yucatán route should not be taught as the standard eastern migration destination; use the agency map above for current geographic guidance.

Eastern monarchs use high-elevation oyamel fir forests in central Mexico as winter habitat. The National Park Service’s monarch migration overview also explains how the eastern annual journey spans multiple generations.
Avoid saying that one butterfly flies the entire annual round trip from a northern garden to Mexico and back. Instead, help children follow the changing locations and seasons on a map.
You can also explore Journey North’s monarch observations to connect a location with a date. Treat an observation as a report from a particular place and time, rather than a promise that monarchs will arrive in your yard on the same day each year.
Add a Simple STEAM Investigation
Observe Wing Patterns
Compare a real monarch photograph with the template before coloring. Ask children to find the body, the two sides of the wing pattern, the dark outlines, and the small white details.
Draw an imaginary line down the center of the paper butterfly and look for matching features on opposite sides. This introduces bilateral symmetry while leaving room for small differences in a handmade drawing.
Compare Materials and Light
Keep a colored paper template beside the plastic butterfly and look at both in the same indoor light. Describe whether you can see through each material and which colors look more opaque.
If you compare two marker types, use the same plastic, similar-sized patches, and the same drying time. Change one material at a time so children can explain which difference they are actually comparing.
Plan, Make, and Revise
Ask children to sketch their planned colors on paper, make the plastic version, and describe one thing they would change next time. This gives the activity a simple design cycle without turning every creative choice into a right-or-wrong answer.
A useful revision might be a larger template, fewer tiny details, or a more stable display. As a Maker Mom and software engineer, I like activities that give kids a concrete problem they can notice and improve.
Questions About Plastic Bottle Butterflies
Can Young Children Make This Craft?
They can help with paper planning and suitable art materials, but an adult should do the plastic preparation and final cutting. Use the paper version when marker labels or sharp edges make the plastic activity unsuitable for your child.
What If the Marker Smears?
Give each layer its full labeled drying time and test the combination on a scrap first. If it still smears, try a product labeled for the surface or switch to coloring the paper template.
Is This Recycling or Reusing?
This activity reuses a bottle by turning it into something else without processing it into new raw material. For a wider discussion, pair it with our Earth Day coding recycling sorting activity and check your local program’s rules before placing decorated plastic or scraps in a recycling bin.
Printable Project Card
The original project card below provides a quick reference for the materials and sequence. An adult should complete all plastic cutting and edge checks, including the first bottle-preparation steps.
Plastic Bottle Butterflies Recycled Art

Make plastic bottle butterflies with this easy recycled art activity and learn about Monarch butterfly migration and how they find shelter and food during their journey!
Materials
- Empty plastic bottle
- Oil-based Sharpie markers (Black)
- Paint pens (White)
- Brush Tip Sharpies (Orange)
- Butterfly Template
Tools
- Scissors
Instructions
- Cut top and bottom off of plastic bottle.
- Cut remaining plastic piece in half.
- Attach butterfly template to underside of plastic.
- Trace butterfly onto plastic using oil-based black marker.
- Repeat steps 3 & 4 for second butterfly.
- Use white and orange paint markers to color in Monarch butterflies.
- Cut out butterflies and soften plastic edges with a nail file.
- Decorate with your recycled art plastic water bottle butterflies!
Notes
For safety reasons, we recommend that an adult cuts out the plastic butterfly. We also recommend using a nail file to soften the edges of the plastic.
Recommended Products
As an Amazon Associate and member of other affiliate programs, I earn from qualifying purchases.


You Might Also Like
Keep exploring with these science and art activities from the original related-activity list. For a seasonal project collection, visit our 31 nights of Halloween STEAM activities or browse more recycled crafts and activities for kids.
Gravity Paint Pours
Watch paint move across a surface and compare the patterns made by different pouring choices.
Chalk Pastel Leaf Rubbings
Capture leaf textures and compare the effects of different papers and art materials.
Oil Resist Tessellation Art
Build a repeating tile and turn its pattern into colorful math-inspired artwork.
Sharpie Art on Canvas
Explore marker inks and solubility with an adult-managed science and art activity.
3D Anaglyph Art
Draw offset colored images and investigate what changes when you view them through colored filters.
Squeegee Art Butterflies
Pull paint across paper and use the resulting colors for a different butterfly process-art project.
Optical Illusion Art
Use lines and patterns to explore how a flat drawing can appear to change or move.
Salt Painting
Observe how colored water moves through a salt-covered design.
Light-Up Constellation Art
Use star templates to turn sky patterns into an illuminated art display.
Chalk Pastel Glue Resist Lion
Follow a directed drawing and use raised glue lines to guide chalk pastel coloring.
Plastic Water Bottle Sun Catchers
Give another water bottle a new purpose in a colorful recycled art project.
Blow Painting with Straws
Compare how the direction and strength of air change paint movement.
Meet Toni, the Maker Mom behind Our Family Code
Hey there, I’m Toni! I’m a software engineer and Maker Mom that finds my joy in unleashing my children’s curiosity by exploring STEAM concepts with my fantastic five!
When I’m not chasing toddlers or raising tweens, you can find me tearing things up and putting them back together over here at Our Family Code.
I am the owner and content creator of multiple educational websites designed to increase access to STEAM & STEM education with a focus on teaching computer science and coding to kids of all ages!