

What kind of Halloween science involves something green, stretchy, gooey, and just gross enough to make kids happy?
Ogre slime.
This ogre slime recipe uses white school glue, borax, a few drops of glycerine, and green food coloring to make an oozy Halloween slime that is perfect for sensory play and polymer science.
Unlike our Zombie Brain Slime, which uses guar gum and no glue, this version is a more traditional glue-based slime. That makes the two recipes perfect for comparing how different polymers and ingredients change the properties of a material.
And because this is Our Family Code, we didn’t stop after one batch. We changed the recipe several times so we could compare the results.
Looking for more spooky science? Find this activity and dozens more in our 31+ Halloween STEM Activities for Kids.

This post contains affiliate links. As an Amazon Associate, Our Family Code earns from qualifying purchases. Please see our Disclosure Policy for more details.
What Makes Ogre Slime Stretchy?
School glue already contains long molecules called polymers.
Before we add an activator, those long polymer chains can move and slide past one another fairly easily.
Borax dissolved in water produces borate ions. When the borax solution is mixed with the glue, those borate ions help create connections between the polymer chains.
These connections are called cross-links.
As more polymer chains become connected, they can no longer move around as freely. The runny glue mixture changes into the stretchy, gooey material we recognize as slime.
The polymer was already there.
The borax changes how those polymer chains interact with one another.
That distinction makes this a much better chemistry lesson than simply saying glue and borax “make a polymer.”
Is Slime a Solid or a Liquid?
Slime behaves strangely because it doesn’t act exactly like an ordinary liquid or an ordinary solid.
Pull it slowly and it can stretch.
Let it sit and it may slowly spread.
Pull it quickly and it may break.
Squeeze it and it feels much firmer.
Slime is commonly described as a non-Newtonian fluid, meaning its flow behavior can change depending on how force is applied.
That gives kids plenty to investigate after the recipe is finished.
Ogre Slime Supplies
You’ll need:
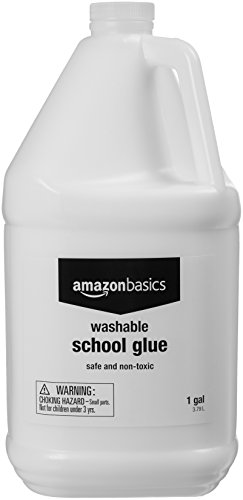
- ¾ cup white school glue
- 2–3 drops glycerine
- 1 drop yellow food coloring
- 1 drop green food coloring
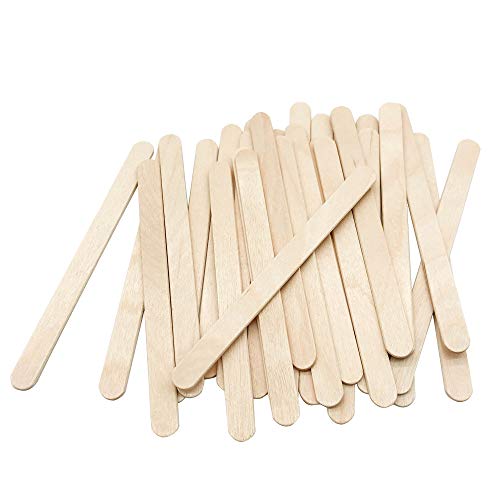
- Wooden craft sticks or spoons
- 2 teaspoons borax
- ¼ cup water
- 2 small plastic or glass containers
- Sealable bag or slime storage container
The original recipe uses a tiny amount of glycerine to change the texture of the slime. In our experiments, adding more glycerine produced a softer, runnier ooze.

That means the glycerine gives us another variable to test later.
Slime Safety
Slime is a science experiment and should be made with adult supervision.
An adult should prepare and handle the borax powder and concentrated borax solution.
The American Chemical Society recommends wearing splash goggles when making borax slime, washing hands afterward, and using gloves for people with sensitive skin or previous borax irritation.
Keep slime away from:
- Eyes
- Mouth
- Nose
- Cuts or irritated skin
- Young children who may put it in their mouths
- Pets
- Carpets and upholstered furniture
This slime is not edible.
How to Make Oozing Ogre Slime
1. Add the White Glue
Pour ¾ cup white school glue into your first container.
The glue provides the long polymer chains we need to make slime.
2. Add the Glycerine
Add 2–3 drops of glycerine to the glue.
Start small.
Too much glycerine can make the finished slime much runnier, which we discovered while experimenting with different batches.
Stir the glycerine into the glue.

3. Make It Ogre Green
Add:
1 drop yellow food coloring
and
1 drop green food coloring
Stir until the color is evenly distributed.
You can adjust the color if your ogre requires a different level of swampiness.

4. Mix the Ogre Goo
Stir the glue, glycerine, and coloring until everything is thoroughly combined.

Before adding the activator, notice how the mixture behaves.
Does it pour?
Does it stretch?
How quickly does it flow off the craft stick?
These observations give you something to compare with the finished slime.

Make the Borax Slime Activator
An adult should complete this step.
In your second container, combine:
2 teaspoons borax
with
¼ cup water
Stir until most of the borax dissolves.
You may still see some undissolved material.
The important part is that you now have a solution containing borate ions that can interact with the polymers in the glue.

Slowly Combine the Two Mixtures
Now comes the chemistry.
Slowly add some of the borax solution to the green glue mixture while stirring.
Do not pour the entire borax solution in at once.
The slime should begin developing a stringy, clumpy texture as cross-links form between polymer chains.
Keep adding small amounts of activator and stirring until the slime begins pulling together.
You may not need all of the borax solution. That was true in our original experiment too.


Knead the Ogre Slime
Once the slime holds together enough to pick up, remove it from the container and begin kneading it.
It may feel sticky at first.
Continue folding and kneading while the ingredients distribute through the slime.
If necessary, add a very small amount of additional activator.
Adding too much borax solution can create a much firmer, less stretchy slime because additional cross-linking limits how freely the polymer chains can move. ACS slime activities similarly demonstrate that the amount of connector strongly affects the final material properties.


Time for Ogre Slime Sensory Play
Once the slime holds together, start experimenting.
Stretch it slowly.
Pull it quickly.
Roll it.
Squish it.
Let it hang between your hands.
Place it on a flat surface and see whether it spreads.
Our kids also discovered that green slime makes a fairly convincing ogre accessory.


The fun part is that every one of those actions is also an observation about the material.
Why Does Changing the Recipe Change the Slime?
Slime is a great materials-science activity because small changes to the recipe can produce noticeably different results.
The American Chemical Society notes that adjusting the ratio of glue, water, and borax can create slimes ranging from slippery and runny to stiff and taut.
We saw the same idea when experimenting with glycerine.
That raises a better question than simply:
Can we make slime?
Try asking:
How can we change the recipe to create slime with specific properties?
Now you’ve got an experiment.
Turn Ogre Slime into a Science Experiment
We made several batches and changed our slime four different times so we could compare the results.
You can do the same thing.
The important rule is to change one variable at a time.
Experiment with Glycerine
Make one batch with: 0 drops glycerine
Then try: 2 drops
and: 4 drops
Keep everything else the same.
Compare:
- Stretchiness
- Firmness
- Flow
- Stickiness
- How quickly the slime spreads
Which recipe produces the best ogre ooze?
Experiment with Activator
Keep the glue mixture identical but change how much borax solution you add.
Does additional activator make the slime:
- Firmer?
- Less sticky?
- Less stretchy?
- More likely to break?
Stop well before turning the experiment into a container of rubbery disappointment.
Experiment with Color
Color won’t substantially change the polymer chemistry when you’re only using a few drops, but it gives younger kids an easy variable to manipulate.
Can they mix:
- Swamp green?
- Bright ogre green?
- Monster blue?
- Sickly yellow-green?

Ogre Slime Experiment Variables
If you want to make the activity more formal, identify the variables.
Independent Variable
The independent variable is what you intentionally change.
For example:
- Amount of glycerine
- Amount of activator
- Amount of glue
- Water content
Dependent Variable
The dependent variable is what you observe or measure.
That could include:
- Stretch distance
- Flow rate
- Firmness
- Spread
- Stickiness
Controlled Variables
Keep the other conditions the same.
For example:
- Glue brand
- Glue amount
- Mixing time
- Container
- Temperature
- Food coloring amount
- Test procedure
That makes it easier to connect the change you made with the result you observed.
Test How Far Your Slime Stretches
Instead of saying one batch is “stretchier,” measure it.
Hold the same amount of slime between two hands.
Pull slowly.
Measure how far it stretches before breaking.
Record the result.
Repeat the test with each slime recipe.
Which batch stretches farthest?
Does the stretchiest slime also feel the softest?
Test How Fast Ogre Slime Flows
Slime flows slowly, which makes it perfect for a simple viscosity comparison.
Place the same amount of each slime sample at the top of a tilted tray or smooth surface.
Mark a finish line.
Start a timer.
Which slime reaches the line first?
The faster-moving slime has a different flow behavior than one that barely moves.
You don’t need laboratory equipment to start collecting useful comparative data.
What Does Glycerine Do in This Recipe?
Glycerine is a thick, slippery liquid that attracts and retains water.
In our particular slime recipe, just a few drops helped modify the feel and flow of the finished slime.
When we changed the amount, we could make the slime more or less oozy.
That makes glycerine useful here not because slime requires it, but because it gives kids another way to engineer the properties of the material.
You can make traditional slime without glycerine.
For this ogre version, we’re using it intentionally because we want ooze.
What Is Cross-Linking?
Imagine a bowl full of long strings.
When none of the strings are connected, they can slide around one another fairly easily.
Now imagine adding tiny connectors between those strings.
Suddenly, the strings can’t move independently anymore.
That is a useful model for cross-linking.
Borate ions act like chemical connectors between parts of the polymer chains in slime. As more connections form, the mixture becomes thicker and behaves differently.

Kids don’t need to memorize the chemistry to understand the big idea:
Changing connections at the molecular level changes what we observe at the material level.
What Is a Polymer?
A polymer is a very large molecule made of repeating chemical units.
Many familiar materials contain polymers.
Examples include:
- Plastics
- Rubber
- DNA
- Proteins
- Cellulose
- Starch
- School glue
In the slime activity, those long polymer chains are already present before we add borax.
Adding borax changes how the chains interact.
That is why describing slime as cross-linked polymers is more accurate than saying the reaction suddenly creates polymers from ordinary glue.
Compare Ogre Slime and Zombie Brain Slime
This is where having two different Halloween slime recipes gets useful.
Our Zombie Brain Slime uses guar gum as its polymer.
Ogre slime uses the polymers found in school glue.
Both recipes use borate chemistry, but they produce noticeably different materials.
Compare them.
Which is:
- Stretchier?
- Clumpier?
- Firmer?
- More slippery?
- Better at flowing?
- More appropriately disgusting?
Then ask:
Why don’t two slime recipes behave exactly the same way?
The starting polymer matters.
How to Store Ogre Slime
Store the slime in a sealed plastic bag or airtight slime container.
Our original batches were kept for about three days.

Homemade slime isn’t designed for long-term storage.
Discard it if you notice changes in:
- Smell
- Color
- Texture
- Cleanliness
Do not flush slime or pour the finished material down the drain.
Throw old slime in the garbage.
Questions to Ask During the Slime Experiment
Try asking:
- What changed when we added the borax solution?
- Was the polymer already in the glue?
- What does cross-linking mean?
- Why shouldn’t we add all of the activator at once?
- What changed when we added more glycerine?
- Which slime stretches the farthest?
- Which slime flows the fastest?
- How could we measure stickiness?
- How is ogre slime different from brain slime?
- Which variable would you change next?
Let kids use what they observe to support their answers.
What Kids Learn from Ogre Slime
This Halloween slime activity gives kids hands-on experience with:
- Polymers
- Cross-linking
- Borate ions
- Material properties
- Viscosity
- Non-Newtonian behavior
- Experimental variables
- Measurement
- Scientific comparison
More importantly, kids learn that changing a recipe can be more than trial and error.
It can be experimental design.
Sometimes the best science is green, gooey, and slightly disgusting. Ogre slime checks all three boxes.
Looking for More Slime Science?
Compare this glue-based slime with our Zombie Brain Slime Without Glue.
You can also explore our DIY Slime Kit and Saline Solution Slime Recipe for another traditional slime formulation.
Different recipes give kids a chance to investigate how changing polymers and activators affects the final material.
Try More Halloween STEM Activities
Keep the gooey Halloween science going with our Zombie Brain Slime, Candy Chemistry Experiment, or Mini Erupting Pumpkins.
You can also find this activity and dozens more in our collection of 31+ Halloween STEM Activities for Kids.
You Might Also Like
Zombie Brain Slime Without Glue
Use guar gum to make a creepy brain-like slime and compare it with traditional glue slime.

Candy Chemistry Experiment
Test Halloween candy while exploring acids, bases, and carbon dioxide reactions.

Try the Candy Chemistry Experiment →
Spooky Ghost Sounds
Explore sound, vibrations, and physics with an easy Halloween STEM experiment.

Try the Spooky Ghost Sounds Activity →
Gooey Slime Recipe

Ingredients
Instructions
- Mix the white glue, glycerine, and food coloring in a small plastic or glass container. We used clear plastic cups that we had on hand from another project. Use your wooden popsicle stick to stir the mixture.
- In your other plastic container, have an adult mix the borax with the water. Use the wooden popsicle stick to mix until most of the borax is dissolved.
- Pour the borax solution into the ogre goo in your first container. Be sure to pour slowly!The mixture should begin to form a stringy texture. Keep adding the borax mixture and stirring until the ogre slime starts to hold together.
- When your ogre slime holds together well, you can pick up the ogre ooze from the container and turn yourself into an ogre!

Notes
Too much glycerine will make your ooze too runny!
Do not put slime in your eyes, nose, mouth, ears, or any other open body part! Make sure you don’t have any cuts!
Recommended Products
As an Amazon Associate and member of other affiliate programs, I earn from qualifying purchases.





Meet Toni, the Maker Mom behind Our Family Code

Hey there, I’m Toni! I’m a software engineer and Maker Mom that finds my joy in unleashing my children’s curiosity by exploring STEAM concepts with my fantastic five!
When I’m not chasing toddlers or raising tweens, you can find me tearing things up and putting them back together over here at Our Family Code.
I am the owner and content creator of multiple educational websites designed to increase access to STEAM & STEM education with a focus on teaching computer science and coding to kids of all ages!


